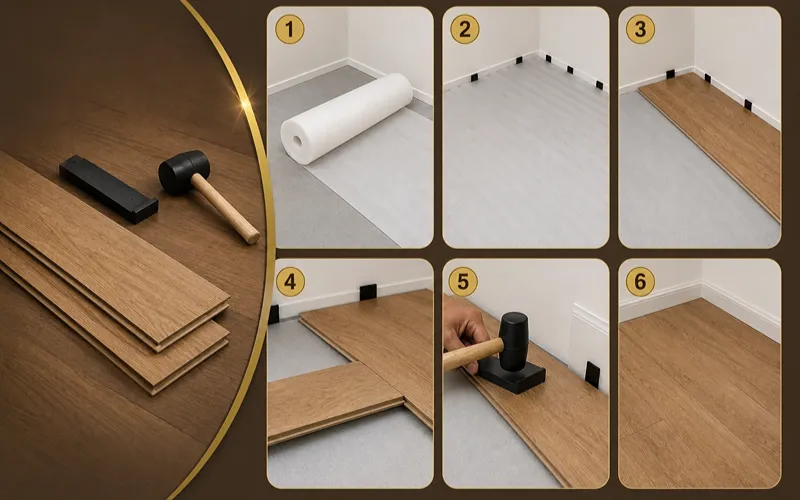
Laminate flooring is a multilayered synthetic floor that replicates the look and feel of wood and stone. These floors contain a core layer made of medium-density fiberboard (MDF)and high-density fiberboard (HDF). This layer offers them a durable base and moisture resistance, so you can install these floors in any residential and commercial space. They are highly resistant to daily wear, scratches, and impacts.
However, their compressed wood fibre core is prone to tearing if not cut correctly during installation. Their top protective layer can chip when cut. Although you can easily install laminate floors with a DIY solution, you have to be careful when cutting them to achieve perfect outcomes. With accurate measurements and neat cutting, you can achieve floors that look aesthetically pleasing and last longer. In this guide, you will explore everything you need to know about how to cut laminate flooring without splintering.
Why Laminate Flooring Splinters When Cut
Laminate flooring is designed from four main layers. The topmost wear layer is made of transparent resin and aluminium oxide for protection and strength. Then a decorative layer, which consists of a high-resolution printed image of stone, wood, or grains for appearance and designs. The third layer is the HDF/MDF core, which acts as a thick, stable backbone. The last is a backing layer, also known as a balancing layer. It is a moisture barrier and prevents warping.
The decorative layer chips easily because it’s just a printed paper protected by the resin, not the core. If the wear layer of your laminate floor is thin or weak, then it will get scratched, exposing the decorative paper under it. However, during cutting, laminate floors can splinter due to using the wrong blade, dull tools, cutting from the wrong side, or rushing cuts.
Avoid using blades with fewer teeth (low TPI or teeth per inch). They create rougher cuts. Instead, use a fine-tooth blade, often 80 TPI or higher. They are specially designed for cutting laminate floors. Moreover, a sharp blade makes clean cuts, while a dull blade tears the material, leading to splinters. Additionally, cutting from the top side causes the blade to pull the material upward, resulting in chipping. To prevent this, always cut with the decorative side facing upwards.
Best Tools for Cutting Laminate Flooring Without Splintering
Due to the unique construction of laminate Dubai Flooring, there are special tools to cut it without splintering. These tools include:
- Laminate Flooring Cutter
- Circular Saw
- Jigsaw
- Miter Saw
- Utility Knife
Choosing the Right Blade to Prevent Splintering
Always use the right blade to prevent splintering while cutting laminate floors. Must consider these things while selecting your blade.
1. Tooth Count
A higher tooth count (TPI) is ideal for a smoother cut and to minimise chipping. For miter and table saw, use a fine finish blade with at least 60 to 80 teeth. For circular saws, use a blade with 40 to 60 teeth for clean cuts. However, for jigsaw and handsaws, opt for the fine tooth blade with a high TPI, generally around 14 to 30 TPI.
2. Carbide Tipped vs Standard Blades
Carbide-tipped blades are highly recommended for cutting laminate floors. The tough and abrasive top layer of laminate floors contains aluminium oxide that can dull standard steel blades immediately. The hardness of carbide tips allows them to withstand the abrasive nature of materials, providing consistently clean and precise cuts
However, standard or high-carbon steel blades will dull very quickly, leading to rough and chipped edges. They also require frequent replacements.
3. Always Choose Fine Tooth Blades
Fine tooth blades matter because they take smaller bites out of the material with each pass. This reduces the impact on the brittle wear layer of the laminate floors. The nibbling action of fine-tooth blades helps prevent the top layers from fracturing or splintering. They cut a smooth and professional-looking edge. Howerer blades with low tooth count designed for faster rougher cuts in standard wood will cause chipping on laminate flooring.
4. Blade Direction Relative to Laminate Surface
The direction of cut relative to the finished surface is also critical for preventing chipping. The blade teeth should enter the finished side first. Circular saws and jigsaws cut on the upstroke; that’s why the decorative side of laminate floors should face down when cutting. However, in mitre saws and table saws, blades cut downward into the material. So the finished side should face up to ensure a clean cut on the visible surface.
5 Steps to Cut Laminate Flooring Without Splintering
To cut your laminate floors without splintering, follow this simple step-by-step method.
1. Measure and Mark
At the start, measure the area where the plank will be installed. Double-check your measurement to avoid waste. Then mark the cut line with a pencil or marker on the laminate. For protection, apply the painter’s tape tightly over the cut line and draw your line on the tape. This helps to hold the surface fibres together and reduce tear-out.
2. Prepare the Plank For Cutting
Position the plank correctly based on your saw. Now, secure the plank by placing the laminate on a stable work surface and use clamps to hold it firmly in place. Ensure both sides of the cut line are supported to prevent the offcut from snapping permanently.
For a guaranteed splinter-free cut, use a sharp utility knife and a straightedge to deeply score the cut through the wear layer before using a saw. This creates a clean breaking point.
3. Make the Cut Slowly and Smoothly
For power saws, bring the blade to full speed before it touches the laminate. Push the saw through the material slowly and steadily. Let the blade do the work without forcing it. Rushing can cause chipping and overheating. Then, guide the saw carefully along your marked line or the edge of your clamped straightedge guide.
4. Finish the Edges
At last, remove the plank and peel off the painter’s tape. Lightly sand the edge with a fine grit if you see any minor roughness or splintering. This will help you to achieve a professional look.
5. Test Fit
Always test-fit the cut piece in its final location before permanently installing it. This ensures an accurate fit without any splinters or flaws.
Special Cutting Situations
While cutting laminate floors, you can face special cutting situations like navigating obstacles, including curves around the pipes, columns, door jambs or rip cuts. To ensure neat and flawless results, always use the right tool and techniques.
1. Cutting Around Door Frames
The professional method is to undercut the existing door frame and moulding so the new laminate plank can slide underneath. In this way, you can create a seamless look without complex notch cuts. For best results, use a Jamb saw (undercut saw) or an oscillating multi-tool.
2. Cutting for Corners and Walls
While cutting for corners and walls, use cardboard or paper to create a precise template of the area. Then trace it onto the laminate plank. A contour gauge is also highly effective for this. Remember to leave an appropriate expansion gap (typically around 1/4 to 3/8 inch) around all walls and vertical obstacles. This will be covered later by baseboards or quarter-round moulding.
3. Curved or Irregular Cuts
If you’re cutting for curved or irregular cuts, then use a jigsaw with a fine-tooth (10-20 TPI) or reverse-cut blade. Create a paper template first if needed. Drill a starter hole for internal cuts, then slowly and carefully follow the marked line. Turn off the orbital action for the cleanest edge. The gap around pipes can be sealed with colour-matched silicone caulk or a decorative pipe escutcheon.
Common Mistakes to Avoid
To cut your laminate floors without splintering, avoid these mistakes:
- Do not use a dull or the wrong type of saw blade. Always use a sharp, fine-tooth blade with high TPI. A carbide-tipped blade with an 80 TPI or higher count mitre saw is an ideal option.
- Do not cut too fast with too much pressure. Always use a gentle, steady feed rate and smooth pressure.
- Do not forget to leave the expansion gaps during installation. Measure twice and factor in the necessary expansion gap. Leave 1/4 inch or 6-10 mm to all measurements that sit against walls or vertical obstacles.
- Skipping the test cuts is another common mistake.
Final Thoughts
Laminate planks and tiles come in different sizes and designs to complement various interior designs. They are also very easy to install with a DIY method. However, to achieve their perfect shape and functionality, you have to cut them very carefully without splintering. Follow the simple techniques given above to cut your laminate planks correctly. When cutting laminate flooring, prioritise safety by wearing eye protection, gloves, and a dust mask.